You can use the Appointments editor to create or edit various types of items on your calendar. For simplicity all of these items are called "appointments" (and sometimes "Events") within Webmail, even though they may technically be individual appointments, meetings with multiple attendees, or "All Day Events" without a specific time or location, such as a birthday or holiday. Further, appointments can be designated as either public or private. Public appointments can be seen by everyone who has the sharing right to view your calendar. Private appointments can only be seen by you. You can customize several aspects of your calendar's layout and features from the Calendar Options screen.
Adding an Appointment to the Calendar
Public and private appointments are both created in exactly the same manner. You will designate the appointment as public or private during the appointment creation process.
To add an appointment to a calendar:
1.Click Calendar to view your default calendar, or select a calendar folder in the Folder List.
2.Switch to the Day, Week, or Month view of the calendar.
3.Depending on your selected theme and calendar view, click New, New Event, or the Add Appointment link or icon. In most themes you can also double-click on a day or time slot to start creating an appointment.
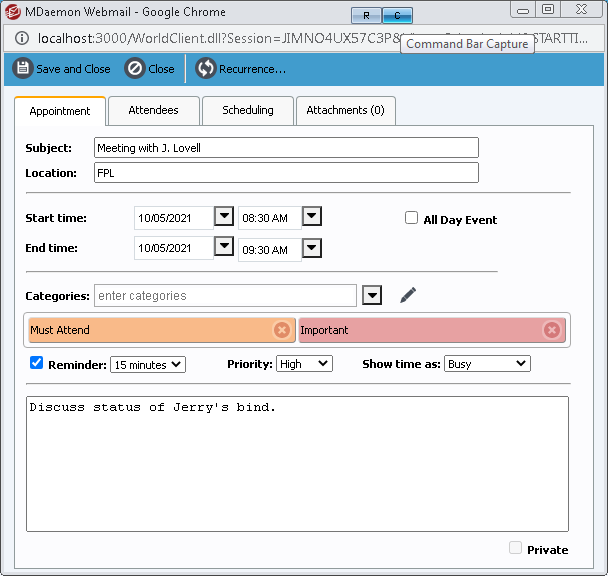
4.Enter a Subject for the appointment. The subject is used as the title of the appointment in appointment listings, and it is required before you can save the appointment. All other appointment fields except date and time are optional.
5.Specify the appointment's Start Time and End Time either by manually typing in the dates and times or by clicking the arrow next to each field and using the tool provided.
6.If the appointment is an "all day event" without a specific start or end time, such as a birthday or holiday, then click the All Day Event check box.
7.If you are using the WorldClient theme and wish to add more details to the appointment, click Add More Details.
8.Add the appointment's Location. This is optional.
9.If you would like a reminder emailed to you, use the Reminder drop-down list to choose how far in advance of the appointment you would like the reminder to be sent.
10.Use the drop-down list to select a Priority level for the appointment.
11.In the Show time as drop-down, choose: Busy, Free, Tentative, or Out of Office. This determines how the appointment's time slot will appear on the Scheduler to other users.
12.Use the text area to specify any other details or information you wish to include about the appointment.
13.Use the Categories field to specify one or more key words or categories for the appointment. You can type these manually or click the down-arrow icon to choose them from a predefined list. Click the pencil icon to manage your predefined list of Categories.
14.Click the Private or Mark as Private check box if you do not want anyone else to be able to see the details of the appointment. Users with access to your calendar folder can see that there is a private appointment scheduled, but they cannot see any of the appointment's details.
15.Use the Attendees option if you wish to add or invite other attendees to the appointment or meeting. You can use the Scheduling Assistant feature to help you add attendees and avoid scheduling conflicts.
16.Use the Recurrence feature ("Repeat" in the WorldClient theme) if you wish to make this a recurring appointment. Choose Daily, Weekly, Monthly, or Yearly, and you will be given a list of other options related to your choice.
17.When you are finished, click Save.
Attendees
If you wish to add or invite attendees when creating an appointment, click the Attendees tab.
For each attendee you would like to add:
1.Click Add from Contacts to add the attendee from your address book, click Scheduling to use the scheduler to add the attendees (not available in the Lite theme), or type the attendee's email address into the space provided.
2.Choose whether or not attendance is Optional or Required for the attendee.
3.By default an invite is sent to each attendee you add. Uncheck/clear the Send Invite box/icon if you do not want a meeting invitation to be sent to the attendee.
4.When you are finished adding attendees, click Save on the toolbar.By
Importing/Exporting Calendar Data
You can import and export your appointments using a comma separated values file. Webmail's importing and exporting options are located on the Folders page.
See Also