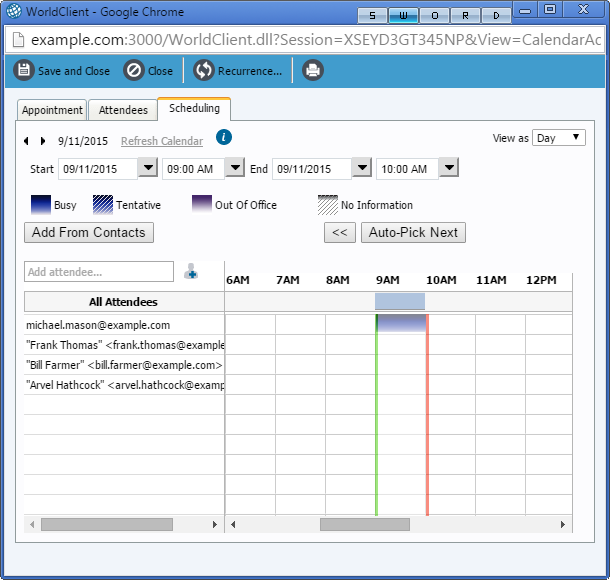
All themes but Lite have a scheduling feature to help you add attendees and find a time slot for your appointment or meeting that will work for everyone. To open the Scheduler, click Scheduling or Scheduling Assistant on the Appointment editor's toolbar (in the Pro theme, it is under the +Add Attendees button). The attendees are listed on the left side of the Scheduler, and a table on the right displays the schedules for all local attendees (attendees from your domain). Each attendee's schedule is listed with color-coded bars to show whether any given slot is scheduled as: Free, Busy, Tentative, Out of Office, or has No Information. A vertical bar representing the length of time allotted for the appointment will be displayed in the table. You can drag the bar left or right to the desired time slot for the appointment. There is also an Auto-pick feature that you can use to cause the bar to automatically jump to the first time slot that is free for everyone.
Finding the Next Available Time Slot
You can have Webmail search for the next available time slot by dragging the green and red bars in the schedule grid to the desired length of time and then clicking on the « Auto-Pick Next » buttons. Webmail will search the schedules of the listed attendees and return the first block of time available to all, unless no free time slot is found. Once you have found the appropriate time slot, click Save to close the window and return to the appointment page with the meeting time and attendees filled in.
See Also